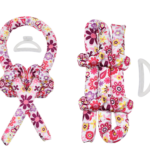
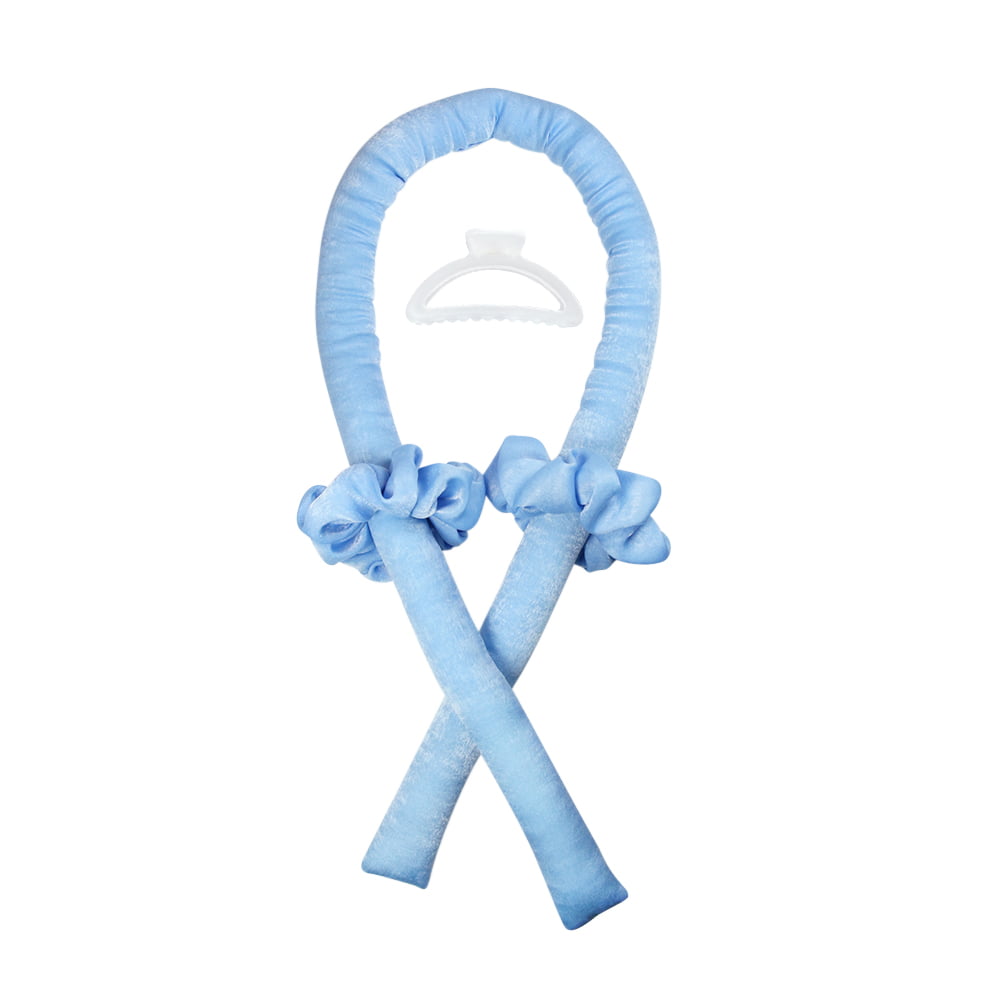
A secure overnight set should stay balanced without pulling your roots, pressing on your ears, or unwrapping at 3 a.m.
Heatless curlers create polished waves while you sleep—if the rod remains where you placed it. Satin can slide backward, one side can loosen, and short layers may escape. Simply wrapping tighter trades slippage for a sore scalp.
Overnight stability comes from surface grip, rod position, temporary anchoring, balanced tension, and suitable end closures. Drawing on hair-fiber research, dermatologist guidance, professional methods, editorial wear tests, and product-development experience, this guide gives consumers a practical routine and brands a commercial non-slip specification.
Quick Answer: How Do You Stop a Heatless Rod Slipping?
- Place the center of the rod at the crown, approximately 2–5 cm behind the hairline.
- Check that both rod tails are equal before wrapping.
- Anchor the center with a small claw clip while you work; use flat clips if an anchor must remain overnight.
- Add similarly sized sections on alternate sides and maintain firm, comfortable tension.
- Wrap the final 5–8 cm of hair flat and secure each end with a small, soft scrunchie.
- If the design permits, connect or loosely tie the rod ends above the nape—not against the ears.
- Cover the finished set with an adjustable sleep bonnet for containment, not compression.
These distances are practical starting points, not universal standards. Adjust for head size, hair length, layers, and sleeping position.
Why Heatless Curling Rods Slip Overnight
Smooth Hair and Low-Friction Materials
Satin and silk reduce rubbing and tangling, but their low-friction surface provides less resistance on straight, fine, conditioned, or glossy hair. A surface can therefore be hair-friendly yet difficult to anchor.
A peer-reviewed review identifies abrasion and friction as contributors to cuticle wear and protein loss, while conditioning and lubrication reduce friction. It does not prove any fabric is “damage-free”; it explains why gentle slip and secure grip must coexist. Review the hair-cosmetics research.
Incorrect Rod Positioning
A rod on the forehead is easily pushed back; one behind the crown can creep toward the nape. Unequal tails add uneven leverage, pulling the center off-axis.
Loose Wrapping and Securing
Large sections create gaps; a loose first turn lets the coil rotate; loose tips escape an oversized scrunchie. Painful tension is not better hold. The American Academy of Dermatology (AAD) warns that repeated pulling can contribute to traction alopecia and includes rollers worn to bed most of the time when styles are too tight. Read the AAD guidance.
Choosing the Wrong Rod Length
A short rod forces bunching; an overly long rod leaves empty tails that catch the pillow. Choose enough length for an orderly spiral plus a small closure zone.
| What moves? | Likely cause | Visible clue | First correction |
|---|---|---|---|
| Whole rod slides back | Center too far forward; low grip | Hairline feels pulled | Move center behind hairline; anchor crown |
| One side drops | Unequal length or hair load | One tail hangs lower | Re-center and divide by density |
| Hair rotates around rod | Loose first turns | Gap near roots | Restart with controlled tension |
| Ends escape | Large tie or blunt ends | Last coil opens first | Wrap ends flat; use mini scrunchie |
| Rod catches pillow | Excess unused length | Long empty tails | Use shorter or bendable design |
Choose Heatless Curlers with the Right Grip
Satin for Smoothness and Hair Protection
Satin is a weave, not a fiber; it may be polyester or silk. Its smooth face reduces snagging and visible frizz, suiting porous, bleached, curly, or tangle-prone hair. It can migrate on glossy hair, especially over a round center without an anchor zone.
Velvet for Stronger Grip
Velvet’s pile grips fine, straight, freshly conditioned hair with less tension. It can feel warmer, collect lint, and resist removal, so unwind it instead of pulling.
Textured and Anti-Slip Curler Designs
A zoned design can place soft texture under the crown and satin on the wrapping tails. A flattened center also resists rolling. Avoid exposed hook-and-loop tape, sharp seams, and rubbery coatings that grab strands.
| Surface | Pros | Cons | Best fit |
|---|---|---|---|
| Satin or silk | Low friction; smooth removal; frizz control | May slide on straight, glossy hair | Dry, porous, curly, or tangle-prone hair |
| Velvet | Strong grip; stable first wrap | Warmer; lint; more removal resistance | Fine, straight, slip-prone hair |
| Hybrid/zoned | Grip where needed; smooth on lengths | More complex construction and QC | Broad retail hair-type range |
| Coarse anti-slip texture | Maximum hold | Higher snag and cuticle-friction risk | Generally avoid for direct hair contact |
Wear-test evidence: InStyle’s 23 editors tested 23 products for 529 total hours. Its side-sleeper pick used a halo form, showing that geometry matters alongside fabric. See the 2026 methodology.
Position the Curling Rod Correctly
Centering the Rod on the Head
Find the rod midpoint and place it over the crown. Both tails should reach the same level. Divide by density, not just the center line; give a naturally heavier side slightly more wrapping space.
Positioning It Away from the Hairline
Begin 2–5 cm behind the hairline. Slide a finger under the first wrap: it should be secure without pinching. Lifted eyebrows, stinging, or headache mean rewrap.
Adjusting Placement for Side and Back Sleepers
Side sleepers should move the center slightly behind the crown and keep tails behind the ears. Back sleepers should connect ends higher or use a halo/multi-rod system that leaves the back center flat. Stomach sleepers generally tolerate a crown position but still need padded closures.
| Sleep style | Preferred placement | Keep clear | Useful design |
|---|---|---|---|
| Side | Slightly behind crown; tails above/behind ears | Temple, ear, jaw | Soft halo or bendable narrow rod |
| Back | Crown with ends connected higher | Center back of skull | Flat center or distributed multi-rod |
| Stomach | Centered crown | Front hairline | Soft single rod |
| Active/mixed | Centered plus flat anchor and bonnet | Hard closure points | Flexible rod with secure end loops |
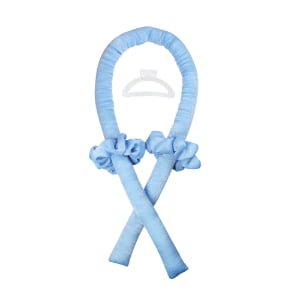
Secure the Rod Before Wrapping
Using a Claw Clip at the Crown
A small claw clip provides one-handed control. Place it over the rod midpoint with a shallow layer of hair. Professional instructions use the same sequence: split, clip at the crown, add hair progressively, and finish with scrunchies. See the stylist-led steps.
A claw clip is not automatically a sleep tool. After securing both sides, test stability without it. Keep it overnight only if small, padded, outside pressure zones, and permitted by the product instructions.
Using Snap Clips or Flat Hair Clips
Two flat clips placed in an X resist front-to-back movement with less bulk. Catch the rod cover and a shallow layer of hair. Rounded edges and covered springs reduce snagging.
Choosing Clips That Do Not Pull the Hair
Reject rough edges, metal burrs, and snagging springs. A clip should survive a gentle head shake yet release without tugging. Reposition any painful clip.
| Anchor | Holding power | Sleep comfort | Best use |
|---|---|---|---|
| Small claw clip | High during wrapping | Medium to low | Application; remove after securing if stable |
| Two flat clips | Medium-high | High when well placed | Active sleepers and satin rods |
| No-crease clips | Medium | High | Fine hair and face-framing layers |
| No center anchor | Technique-dependent | Highest | Grippy or halo-style designs |
Wrap Hair with the Right Technique
Dividing Hair into Even Sections
Detangle, then divide by thickness. A two-tail rod needs similar hair mass on each side. Dense hair may need smaller subsections or multiple rods; fine hair needs less hair per turn.
Maintaining Consistent Tension
Steady the rod with one hand and guide hair with the other. Use firm, comfortable tension from roots to ends. Tightening only the scalp stresses roots while lengths remain loose.
Adding Hair Gradually While Wrapping
Start with face-framing hair, wrap away from the face, and add a similar amount on every pass. Set new turns beside previous ones. Light overlap aids contact; heavy overlap slows drying.
Preventing Loose Ends
Reduce section size near the tips. Smooth the final 5–8 cm and wrap flat. Use lightweight mousse or a no-crease clip on escaping layers; heavy oil can reduce hold and increase slip.
| Checkpoint | Pass | Redo when |
|---|---|---|
| Balance | Both tails finish at similar height | One side hangs or feels heavier |
| Roots | Secure with no pinching | Gap, sting, or lifted hairline |
| Spiral | Orderly turns with light overlap | Hair piles in one area |
| Ends | Flat and fully captured | Tips fan out below tie |
| Movement | Stays centered after gentle head turn | Rod shifts more than a small amount |
Timing note: Remove only when dry. Although many methods specify slightly damp hair, some InStyle testers had smoother results on dry hair. Use the least moisture needed to reset; wet, overlapped hair may remain damp until morning.
Secure Both Ends of the Curling Rod
Using Soft Scrunchies
Match the scrunchie to the hair at the tip. Full-size ties may not grip fine ends; narrow elastics can crease. Mini satin or velvet scrunchies offer a useful balance.
Tying the Rod Ends Together
If designed to bend, connect both ends loosely above the nape and away from ears. This redistributes load. Do not sharply bend foam-only rods; repeated compression degrades filling.
Using Button, Loop, or Hook Closures
Integrated closures reduce reliance on knots. Fabric-covered buttons and loops are easy to inspect. Pad hard parts and keep exposed hook-and-loop tape away from loose strands.
Avoiding Overly Tight Fastening
A secure set should not ache. AAD guidance says pain or headache means a style is too tight. Although written for extensions, the principle applies to prolonged pulling. See the recommendation.
| Closure | Security | Comfort | Watch for |
|---|---|---|---|
| Mini scrunchies | Adjustable | High | Elastic fatigue; size mismatch |
| Tied rod ends | High | Medium-high | Bulky knot; over-bending |
| Fabric button + loop | Repeatable | High if padded | Button pressure; loop stretch |
| Covered hook | High | Medium | Snagging and hard contact |
Make Heatless Curlers Comfortable for Sleep
Selecting a Soft and Flexible Filling
Soft foam is comfortable but may flatten; dense foam holds shape but increases pressure. Choose resilient filling with good recovery. Any flexible core should remain centered, padded, capped, and free of sharp bends.
Reducing Pressure Around the Ears
Tuck tails behind—not on—the ears and move scrunchies outside the ear line. Test your normal position for two minutes; minor standing pressure can become significant on a pillow.
Choosing the Right Rod Thickness
A 2–3.2 cm diameter is a practical comfort starting point. Above roughly 3.5 cm produces looser volume but may bother side sleepers. Narrow rods reduce bulk but curl tighter. Head shape, desired curl, and foam compression still matter.
Using a Sleep Bonnet for Extra Security
An adjustable bonnet contains layers and keeps tails off the pillow. Use it over a correctly positioned set without compression. Because it can retain humidity, begin with nearly dry hair.
| Feature | Helps with | Potential trade-off |
|---|---|---|
| Resilient medium-density filling | Shape recovery and cushioning | Requires compression testing |
| Flattened/oval crown zone | Rolling and crown pressure | May alter root shape |
| Flexible padded core | Custom positioning | Core-fatigue and end-cap QC |
| Adjustable satin bonnet | Loose layers and pillow catching | Warmth and moisture retention |
| Multiple diameter options | Sleep style and curl customization | More SKUs and inventory |
In a 2026 Shop TODAY test, products were worn on slightly damp hair for at least eight hours where possible. A silk bun-style tool scored 5/5 for comfort; a wired satin headband scored 4.75/5 for comfort and 5/5 for ease. Editorial scores are not clinical measurements, but they support testing geometry and structure together. Review the test.
Troubleshoot Common Overnight Problems
What to Do If the Rod Slides Back
Move the midpoint 1–2 cm back, flatten the crown section, and add opposing flat clips. Bend or connect tails so shoulders cannot push the center backward.
What to Do If One Side Becomes Loose
Compare hair mass and tail length. Rewrap with smaller additions, match tension, and replace stretched scrunchies. Clip the first escaping layer instead of tightening everything.
What to Do If the Curler Feels Too Tight
Loosen immediately: unfasten the end, release root turns, and move painful clips. Persistent tenderness, breakage, or thinning warrants stopping and consulting a dermatologist.
What to Do If Hair Unwraps During Sleep
Use nearly dry, detangled hair and light foam. Wrap tips flat, use smaller scrunchies, connect ends, and add a bonnet. If hair must stack, select a longer or multi-rod set.
| Symptom | Tonight’s fix | Better product choice |
|---|---|---|
| Center travels backward | Reposition; X-anchor; lift tails | Grippy/flat crown panel |
| One side loosens | Balance density; smaller additions | Marked midpoint; zoned texture |
| Tips fall out | Mini scrunchie; flat end wrap | Tapered or looped end closure |
| Ear pressure | Move tails and ties behind ears | Narrower, softer, bendable rod |
| Hair remains damp | Remove only when dry; use less water next time | Breathable cover; less bulky overlap |
| Short layers escape | Flat clips plus bonnet | Multi-rod or textured design |
Features Brands Should Consider for Non-Slip Heatless Curlers
Non-slip performance is a product-system problem. Grand View Research values global hair accessories at US$23.4 billion in 2024, estimates US$27.2 billion in 2026, and projects US$46.6 billion by 2033. Elastics and ties held 32.6% in 2024, making closures commercially relevant. These are broad hair-accessory figures, not heatless-curler sales. View the market summary.
Statista projects US$99.91 billion in worldwide Hair Care revenue for 2026 and a 2.79% CAGR for 2026–2031. This is adjacent context, not curler sales. View the Statista outlook. Sell-through, return reasons, and coded reviews remain more actionable.
Flexible Internal Construction
Prototype two densities; sleep-test side, back, and mixed-position users; measure compression recovery. For wire cores, test bending cycles, migration, end caps, and wash exposure. Core failure is a safety issue.
Secure End Closures
Test closures after repeated use and contact with leave-ins. Record elastic recovery, button pull strength, loop elongation, and snagging. Include mini scrunchies for fine ends and one spare.
Material Grip and Surface Texture
Build zoned grip with a flat center, soft underside texture, satin wrapping face, and smooth seams. Test snagging across straight, curly, bleached, and coily swatches, plus colorfastness against damp cloth and styling products.
Coordinated Clips, Scrunchies, and Bonnets
A complete set may include two flat clips, two mini scrunchies, a crown anchor, and adjustable bonnet. Show side- and back-sleeper placement. Packaging still needs moisture, tension, cleaning, and overnight safety instructions.
| Component | Engineering starting point | Minimum validation |
|---|---|---|
| Rod surface | Smooth wrap zones; subtly grippy crown zone | Snag, seam, colorfastness, product-transfer tests |
| Shape | Oval/flat center; 2–3.2 cm comfort-oriented option | Side/back sleep panel; curl consistency |
| Filling/core | Resilient foam; fully padded flexible core if used | Compression recovery; flex fatigue; end integrity |
| Closures | Mini scrunchies plus optional padded loop/button | Cycle, pull, elastic-recovery, snag tests |
| Accessories | Flat clips, crown clip, adjustable bonnet | Edge inspection, spring force, band comfort |
| Instructions | Hair type, moisture, tension, sleep-position diagrams | Consumer comprehension and misuse review |
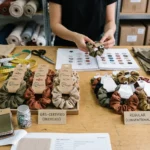
QN Beauty supports specification development, sampling, logos, color matching, bundles, and packaging. Its factory profile reports 15+ years of manufacturing experience, 220+ skilled workers, and BSCI, ISO 9001, and SEDEX certification. Explore heatless curling rod formats, review our custom service, or visit QN Beauty.
Support claims with the final construction. Fabric, washable covers, adjustable closures, and dimensions are verifiable; “prevents breakage,” “damage-free,” and “stays on every sleeper” require stronger substantiation and regional review.
Frequently Asked Questions About Heatless Curlers
How do I keep a heatless curling rod from falling out?
Center it 2–5 cm behind the hairline, anchor the midpoint while wrapping, keep equal hair mass on both sides, add hair in small consistent sections, secure the ends with mini scrunchies, and contain the finished set with a properly fitted bonnet.
Why does my heatless curler slide backward overnight?
The center is often too far forward, the first wraps are loose, or the tails hit your shoulders and push the rod backward. Reposition it near the crown, use two flat opposing clips, and bend or connect the tails away from the shoulders.
Is satin or velvet better for keeping a heatless curler in place?
Velvet usually provides stronger grip; satin generally offers smoother contact and removal. Straight, glossy hair may benefit from velvet or a zoned hybrid. Dry, porous, curly, or tangle-prone hair may prefer satin with a better center anchor.
Can I wear a bonnet over heatless curlers?
Yes. An adjustable bonnet helps contain layers and prevents rod tails catching the pillow. It should sit securely without compressing the curlers or pulling the hairline. Begin with nearly dry hair because a bonnet can slow moisture loss.
How tight should I wrap heatless curlers?
Use even, firm tension that removes gaps but does not hurt. Pain, throbbing, scalp tenderness, or headache means the style is too tight. Release the closure and rewrap with less root tension.
How can side sleepers wear heatless curlers comfortably?
Place the center slightly behind the crown, keep rod tails and scrunchies behind or above the ears, and choose a flexible narrow rod or halo design. Test your usual sleep position for two minutes before committing to the night.
Can heatless curlers damage hair if they are too tight?
Repeated, prolonged pulling can stress hair and scalp. Avoid painful tension, rough closures, and daily pressure on the same points. Stop if you notice persistent tenderness, broken hairs, or thinning, and consult a dermatologist when symptoms continue.
Heatless Curlers That Stay Put: Expert Summary
The most reliable overnight set is not the tightest one. It is balanced, centered, appropriately grippy, evenly wrapped, softly closed, and positioned for the way the user actually sleeps. Satin may need a better crown anchor; velvet may need gentler removal. Flat clips solve movement without creating a bulky pressure point, while a breathable adjustable bonnet adds containment after the fundamentals are correct.
The next generation of heatless curlers will move toward zoned materials, flattened crown geometry, interchangeable diameters, size-inclusive lengths, lower-profile closures, and sleep-position-specific kits. Brands that test comfort and retention across real hair densities—and publish clear use instructions—will create more trust than brands relying on a one-size-fits-all “damage-free” promise.
Ready to develop or source a more secure set? Contact QN Beauty with your target hair length, diameter, cover material, filling, closure system, accessories, order quantity, and packaging direction. Request a prototype and evaluate it for grip, curl quality, pressure, and overnight movement before approving production.