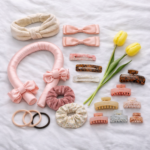
Acetate Claw Clip Manufacturing Process: A Factory-Level Step-by-Step Guide (From Drawing to Finished Product)
Acetate claw clips look simple, but consistent quality depends on dozens of small decisions—sheet selection, CNC cutting precision, edge polishing, hinge alignment, spring strength, and final inspection. For B2B buyers, understanding the acetate claw clip manufacturing process helps you:
- spot quality risks before mass production,
- write clearer RFQs and tech packs,
- reduce returns caused by breakage, sharp edges, or weak grip.
This guide explains the manufacturing workflow from factory perspective, with checkpoints you can use during sampling and QC.
Quick Overview: The 8 Main Stages
| Stage | What Happens | Buyer Checkpoint |
|---|---|---|
| 1) Design & specs | Confirm clip size, jaw curve, tooth geometry, hinge structure, tolerance | Ask for a drawing + key dimensions (mm) and tolerance range |
| 2) Acetate sheet selection | Choose sheet pattern/color; confirm thickness and consistency | Approve a reference sheet; define acceptable pattern variation |
| 3) Cutting / shaping | CNC/laser/precision cutting into raw parts; drilling holes | Check symmetry, hole positions, tooth spacing |
| 4) Heat forming / bending | Form the jaw curve and fit; control warping | Ensure even curvature and no stress whitening |
| 5) Polishing & edge finishing | Buff/polish; remove burrs; round tooth tips and corners | No sharp edges; run “hair snag test” on inner teeth |
| 6) Hardware assembly | Install spring + hinge/rivet/screw; align both jaws | Check “no wobble” hinge alignment + spring consistency |
| 7) Logo & finishing options | Laser/engraving/printing; optional surface finish (matte) | Confirm logo placement and durability (rub test) |
| 8) QC + packaging | Final inspection, cycle tests, packing into bags/cards/boxes | Define inspection standard + packaging spec before mass production |
Stage 1: Design & Technical Specs (Where Quality Starts)
Factories typically confirm the following parameters before cutting material:
- Overall size (length and jaw width)
- Tooth geometry (depth, spacing, tip rounding)
- Jaw curve (comfort pressure and holding force)
- Hinge structure (rivet/screw location and tolerance)
Buyer tip: Don’t rely on a single product photo. Ask for a basic drawing (or a tech pack page) with mm dimensions and tolerances.
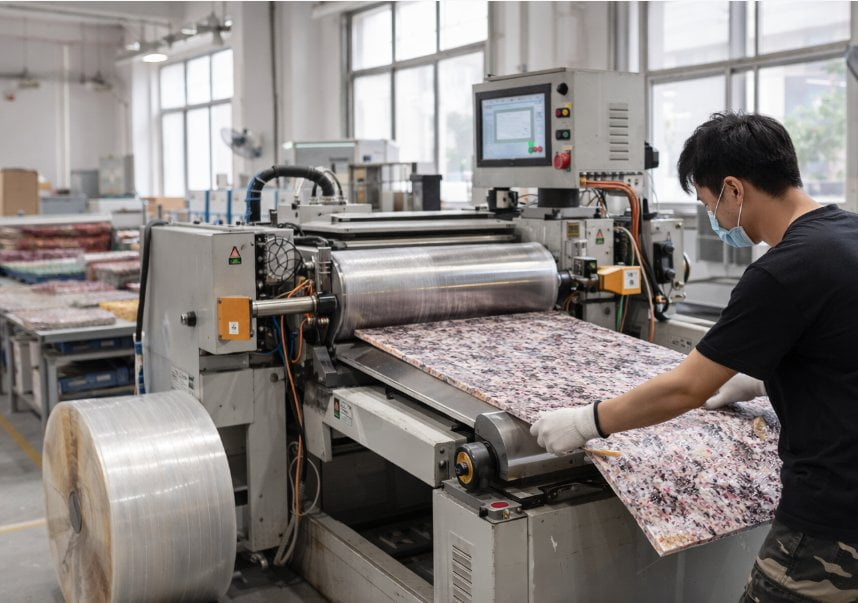
Stage 2: Acetate Sheet Selection (Color/Pattern Consistency)
Acetate sheets create the signature look—tortoise, marble, translucent, etc. But patterns are naturally variable. The factory typically manages this by:
- selecting sheet batches with similar pattern density,
- controlling the cutting layout so top pieces look consistent,
- confirming thickness consistency for stable assembly.
Buyer tip: Approve a reference sheet sample and define an “acceptable variation range” for pattern and color tone. This reduces “not like photo” complaints.
Stage 3: Precision Cutting & Drilling
The clip body is cut from sheets into top/bottom jaws and smaller components. Precision matters because:
- misaligned holes cause wobbling hinges,
- uneven teeth spacing causes slipping or discomfort,
- asymmetry leads to poor jaw closing and breakage.
Buyer checkpoint: Ask to see raw-cut parts or early-stage samples to confirm symmetry and hole positioning before polishing.
Stage 4: Heat Forming / Bending (Controlling Warping)
To create the correct jaw curve, factories heat-form parts and bend them into shape. This stage must balance:
- curve accuracy (holds hair but doesn’t squeeze),
- stress control (avoid stress whitening or micro-cracks),
- cooling stability (prevent warping after cooling).
Buyer checkpoint: Test comfort on different hair thicknesses and inspect for stress marks around the bend areas.
Stage 5: Polishing & Edge Finishing (Where Returns Are Won or Lost)
Polishing is not only for shine—it’s also for safety and comfort. A quality acetate claw clip should have:
- smooth outer edges (no burrs, no sharp corners),
- rounded tooth tips (reduced scalp pressure),
- smooth inner surfaces (reduced snagging).
Buyer checkpoint: Perform a quick “hair snag test” by sliding hair strands along inner teeth and edges. Any snagging becomes negative reviews fast.
Stage 6: Spring & Hinge Assembly (Grip Strength + Alignment)
Assembly typically installs the spring and hinge hardware (rivet/screw), then aligns the two jaws so they close evenly. Key issues that factories manage here:
- spring strength consistency across the same batch,
- hinge alignment (no wobble, no uneven closing),
- open/close smoothness (no grinding, no sudden stiffness).
Buyer checkpoint: Ask for a simple open/close cycle test standard (e.g., repeated open-close cycles) and confirm the target “feel” (light/medium/strong).
Stage 7: Branding (Logo) and Optional Finish Upgrades
Common branding methods for claw clips include laser marking, engraving, or printing. Optional finish upgrades can include matte or soft-touch looks (depending on the material and process).
Buyer checkpoint: For logos, request a rub test (dry cloth) and confirm logo placement with a marked diagram before production.
Stage 8: Final QC + Packaging
Final inspection usually covers:
- surface scratch standard,
- edge safety and tooth smoothness,
- hinge stability and spring consistency,
- visual consistency of pattern/color tone.
Then the factory packs each unit into standard bags, hang cards, or custom packaging depending on your program.

Factory QC Checklist for Buyers (Copy & Use)
| QC Item | Pass Standard (Example) | How to Test Quickly |
|---|---|---|
| Edge finishing | No sharp edges, no burrs | Finger sweep + visual check under light |
| Hair snag risk | No snagging on inner teeth | Slide hair strands across teeth/inner surfaces |
| Hinge alignment | No wobble; even jaw closing | Close clip; check gap symmetry; gentle side-to-side wiggle |
| Spring consistency | Consistent open/close feel within batch | Compare 10 pcs; note outliers |
| Pattern consistency | Within approved variation range | Compare to reference sheet and approved sample |
| Scratch standard | No deep scratches; minor marks within agreed standard | Inspect under strong light at fixed distance |
RFQ Template: Acetate Claw Clips (Copy & Paste)
Subject: RFQ – Acetate Claw Clips – Custom / Private Label

1) Size & type:
- Classic / Jumbo / Mini set
- Length __ mm; jaw width __ mm; thickness __ mm

2) Material:
- Cellulose acetate sheet or acetate-look?
- Pattern(s): (tortoise / marble / clear / custom)
- Can you share available stock patterns for quick sampling? (Yes/No)

3) Finish:
- Glossy / matte / soft-touch
- Scratch standard expectation: __

4) Hardware:
- Spring strength target: (light / medium / strong)
- Hinge requirement: no wobble; even closing (Yes/No)

5) Branding:
- Logo method: (laser / engraving / printing)
- Placement: hinge / inner / outer
- Artwork file format: AI/PDF/SVG

6) Quantity plan:
- Total pcs: __
- Breakdown by pattern/color: __
- Can MOQ be combined across patterns if same process? (Yes/No)

7) Packaging:
- Standard bag / hang card / custom card / box
- Barcode/label requirement: (Yes/No)

8) Target market + compliance:
- Market: __
- Any test/document needs: __

9) Timeline:
- Sample needed by: __
- Mass production ship date: __
Conclusion: Manufacturing Transparency = Better Quality + Faster Reorders
For acetate claw clips, quality is mostly decided by process control—sheet selection, forming stability, polishing, and hinge/spring assembly. If you use the stage-by-stage checkpoints above, you’ll write clearer specs, approve samples faster, and reduce the most common causes of returns.
Internal originality check (estimate): Low–Medium risk (approx. 10%–20% overlap due to unavoidable industry process terminology). Structure, tables, QC checklist, and RFQ template are newly written for B2B search intent and can be published as evergreen SEO content.